
Review · AUCKLAND CITY HIGHLIGHTS TOURS
Auckland Explorer: Sightseeing Hop-on Hop-off Tour
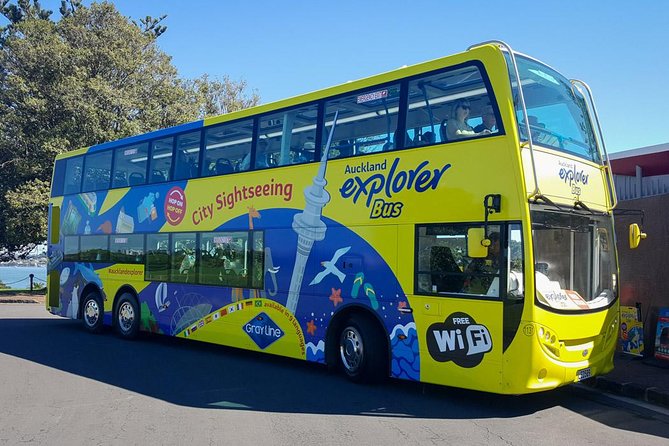
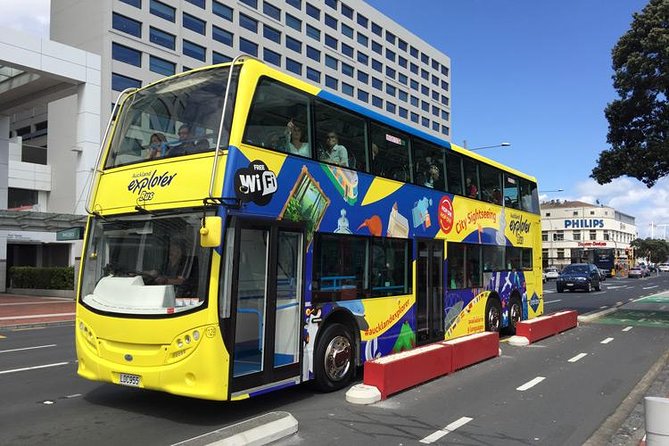
Auckland’s hills are no joke, so a bus loop really helps. The Auckland Explorer is a hop-on hop-off sightseeing ride built for first-time orientation, with English audio commentary and air-conditioned buses when the weather swings. You can stay on for the full loop, or hop off at top stops like the Sky Tower, Auckland Museum and Parnell Village at your own pace.
I love that the route lets you build your own day without getting stuck waiting for taxis every time you change plans. I also like the practical touches: WiFi onboard and regular departures on a seasonal schedule make it easier to keep moving. One drawback to factor in is that crowds and traffic can still create wait times, and a few riders have reported narration or timing problems on specific days.
Key takeaways before you board
- Audio in English for the full loop, so you can learn while you ride.
- Hop off at major anchors like the Sky Tower, Auckland Museum, Parnell Village and Kelly Tarltons.
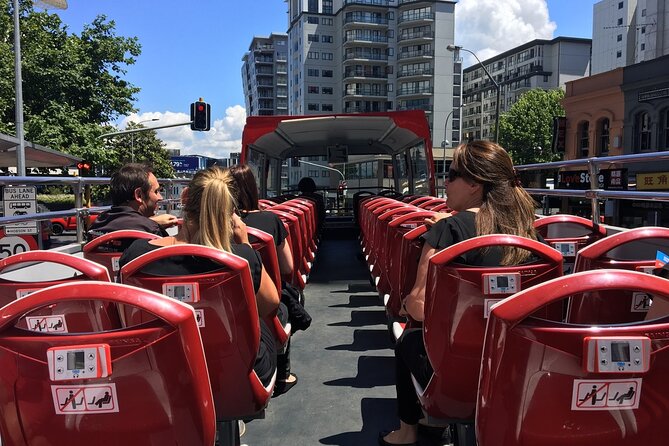
- You get WiFi and air-con, useful if you’re riding open-top in sun or stepping into heat later.
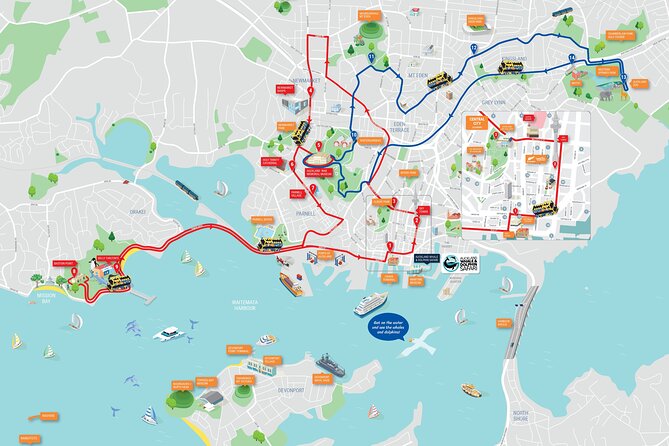
- Two routes can overlap and change, which can be great for extra city coverage, but slightly confusing.
- Plan for hills and walking at the end stops, especially if you go up to viewpoints.
Other ways to see the city in a morning
- Waiheke Island: Ferry & Hop-On Hop-Off Explorer Bus Tickets★ 4.6 · 3,311 reviews
- Auckland Explorer: Sightseeing Hop-on Hop-off Tour★ 4.0 · 1,180 reviews
- Half-day Discover Auckland City Sightseeing Tour★ 5.0 · 1,080 reviews
- Auckland: Hop-On Hop-Off Explorer Bus Ticket★ 4.4 · 1,064 reviews
How this hop-on hop-off tour really helps you see Auckland

This is one of those tours that works best when you use it like a tool, not like a rigid schedule. You start downtown around Customs Street East, then you can ride the loop for the big picture or jump off to explore specific stops.
Auckland is stretched out and hilly. Even if you like walking, you will burn energy climbing and then paying for it later with slower legs. The bus keeps you in motion, and the commentary gives you context while you look around.
Here’s the value question: at $43.44 per person, you’re paying for efficient transport plus an easy orientation layer. If you’re planning to hit several paid sights in one day, that alone can make the bus feel reasonable. The best move is to match your bus plan to what you actually want to do, instead of trying to see everything.
Price and time math for a 1-day versus 2-day plan
You can use the ticket over 1 or 2 days. That matters, because hop-on hop-off tours work on “repeat visits” logic. If you only have one day, you’ll choose fewer stops and accept longer walking gaps between them. With two days, you can spread out the museum and viewpoint stuff across cooler hours.
Keep in mind that the bus runs on a seasonal schedule and departs regularly through the day. Most people should plan around the fact that city traffic and crowds can affect timing. If you’re doing this during a busy cruise day, add breathing room. One review noted that queues and delays can show up even with extra coaches added.
A small practical tip: decide your “must do” first, then use the bus as your shuttle between those targets. Trying to stuff in every stop tends to turn the day into a sprint.
The Downtown start: Customs Street East to Sky Tower views

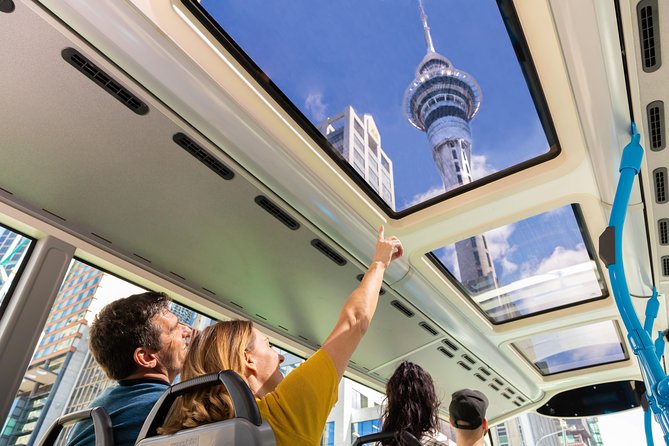
Most days, your easiest jump-on is the main departure near Customs Street East. From there, you head toward the CBD core and the big visual anchor: SkyCity Auckland and the Sky Tower.
The Sky Tower stop is the moment where Auckland starts to make sense. From street level you get the central-city layout, then you can choose whether to go up (tickets and redemption steps can vary). One rider specifically mentioned needing to exchange a voucher at SkyCity Auckland, so if you’re pairing the bus with Sky Tower access, plan extra minutes there.
If you want a good photo strategy, sit on the upper open-air section when weather is pleasant. It tends to feel more “Auckland,” and the city looks sharper when you’re higher and not stuck behind glass.

Auckland Art Gallery and Newmarket: culture and coffee-ready breaks

Next up are stops that help you pair Auckland’s modern downtown with its arts and shopping pulse.
- Auckland Art Gallery is a strong stop if you want a calm reset. It also helps you understand why locals treat the city center as more than offices and cruise crowds.
- 359 Broadway (Westfield Newmarket) gives you the practical side of sightseeing. It’s a convenient place to grab snacks, refill water, and take a breather before you head into the more residential and coastal legs.
This is where hop-on hop-off shines. If you feel energized, you can jump off and explore. If you feel “I need a snack now,” you can wait for the next bus and keep your day smooth.
Auckland Museum and the War Memorial Museum: where history clicks

This is the densest cluster of “learn about Auckland” stops, with Auckland Museum and the Auckland War Memorial Museum area on the route.
If you only do one culture stop, this is a solid choice because you’re in a zone that feels like a real neighborhood, not just a roadside viewpoint. It’s also a smart move for rainy weather, since museums keep your time productive even when you’d rather not walk.
A practical pacing tip: if you’re also planning a big climb later in the day, do the museum portion earlier. It’s easier to manage energy while your legs are fresh.
Parnell Village and Holy Trinity Cathedral: pretty, slow, and walkable
The Parnell section is a favorite because it feels like a different Auckland mood. You pass Holy Trinity Cathedral at the junction of St Stephens Ave and Parnell Rd, then get dropped near Parnell Village.
Parnell Village is ideal for a longer wander. It’s not just about stopping at one building, it’s about strolling and letting the streets set the pace. This is also a good area to reassess whether you want to keep going with the full loop or stay longer at one spot.
One thing to watch: this part of Auckland can come with hills. Even if you’re on a bus, you may still walk up and down side streets. Wear shoes you can move in without thinking too hard.
Bastion Point lookout and the Tamaki Drive waterfront feel
If you like viewpoints, this is where the tour starts paying off visually.
- Bastion Point Lookout gives you a classic Auckland perspective, with coastal air and open views.
- Then you head along Tamaki Drive toward Sea Life Kelly Tarltons at the aquarium stop.
Kelly Tarltons is a fun “family-friendly or rainy-day” anchor. If you’re traveling with kids, it’s the kind of stop that can pull your whole group back onto the same page. Even if you’re traveling solo, seeing the marine exhibits gives you a break from city streets and a reason to spend time indoors.
A useful strategy: combine Bastion Point for views, then pivot to Kelly Tarltons for a weather-proof block. That keeps your day from turning into “we’re out, but it’s cold and windy, so everything takes longer.”
Mount Eden and Eden Park: the climb decision you should plan
This is one of those “the bus gets you close, your legs finish the job” moments. The route includes Mount Eden and Eden Park, both of which can be surrounded by steep terrain and stairs.
One review specifically warned about the hike up to Mr Eden (they were trying to remember the Māori name). That’s real advice. If you want the top views, treat the climb like a scheduled activity, not a spontaneous impulse. Go early in the day if you can, and give yourself time to enjoy the view without rushing back to your next bus.
Even if you don’t climb, Eden Park and the surrounding areas can still work as a quick “stand and look” break if you’re low on energy.
Auckland Zoo and MOTAT: a strong pick for action and hands-on stops
In the later stretch, the route brings you to Auckland Zoo and MOTAT Museum of Transport and Technology.
This is a smart section if your group includes people who want something more than scenery. Zoo time is usually flexible based on your interests and stamina. MOTAT can be a great contrast if you’ve already spent a morning on skyline and museums.
If you’re trying to fit a lot into a single day, choose one “big commitment” stop from this area. Do it well, then use the bus for the rest.
Open-air versus air-conditioned: sit choices that change the whole ride
You’ll see options between open-air upper seating and closed, air-conditioned sections. If the day is mild, open-air can feel like your best upgrade for sightseeing. If it’s hot or rainy, stay lower in the air-conditioned area and use the windows for steadier photos.
Also, don’t assume you’ll be able to hear commentary equally from every seat. One rider mentioned speaker issues on a bus where audio system problems caused skipping. If you notice loud cracking or broken narration, move seats or switch buses at the next stop if staff can help.
How to pace your day so you do not feel rushed
The bus gives you the option to stay onboard for the full loop, which is great for orientation. But if you want real enjoyment, I’d plan your day in blocks:
- One short “walk and photo” block in the CBD or Parnell.
- One medium indoor block at a museum or Kelly Tarltons.
- One viewpoint decision block where you accept that you might climb, then reward yourself.
Some people ended up on two route circuits due to route transitions around the museum area. For some, that created a longer ride and covered more of the city. For others, it felt confusing at the moment it happened. Either way, this is why pacing beats forcing it.
When things go wrong: crowds, waits, and route confusion
Most days the system works smoothly, but Auckland can throw curveballs.
Common friction points from real-world feedback include:
- Wait times if bus frequency dips or demand spikes.
- Crowd surges during cruise days, even when extra coaches are added.
- Audio and equipment glitches on specific buses.
- Route changes around the museum zone that can make your trip feel different than you planned.
If you’re on a tight schedule, keep your “must be back” time realistic. Also build in buffer time when you’re heading to ticketed attractions like the Sky Tower.
A simple rule I use: if you’re unsure whether you’re on the right line, don’t guess while the bus is moving. Ask staff at the stop. It’s better to lose 3 minutes than to miss the whole plan.
Who should book the Auckland Explorer Bus
I think this tour fits best if you:
- Are visiting Auckland for the first time and want easy orientation across multiple neighborhoods.
- Want a flexible day with major sights without complicated logistics.
- Are traveling with mixed ages, since museum and aquarium stops can balance interests.
- Have limited time, including cruise ship days where you need a fast way to sample the city.
It may not feel worth it if you:
- Want a deeply detailed, stop-by-stop guided lecture. Some riders found the narration less detailed than other cities.
- Are allergic to waiting. If you hate lines and intervals between buses, consider private options or taxis for key legs.
Should you book this tour?
I’d book it if you want an efficient “big picture plus optional exploring” approach. For most visitors, the hop-on hop-off flexibility, the English commentary, and the mix of skyline, museums, and coastal stops make it a practical first-day tool.
If you do book, plan smart: choose one viewpoint climb, pick one or two indoor attractions, and treat the rest as transit. And if you’re pairing it with Sky Tower access, give yourself time at SkyCity Auckland for any voucher or entry steps.
Bottom line: at $43.44 per person, it’s good value when you use the bus to connect the dots across Auckland’s spread-out neighborhoods.
FAQ
What is the duration of the Auckland Explorer hop-on hop-off tour?
The experience is listed as about 1 day (approx.). The bus loop is described as taking around an hour, though some days can run longer depending on route flow.
Is the ticket valid for one day or two days?
Your bus ticket is valid for one or two days, so you can choose how you want to spread sightseeing across Auckland.
Where does the tour start?
The main departure point is at Customs Street East in downtown Auckland (Stop 1). The tour start time listed is 9:00 am.
What languages are the audio commentary available in?
The tour includes English audio commentary onboard.
What’s included in the price?
Included features are the hop-on hop-off tour, informative English commentary, GST, air-conditioned vehicle, and WiFi on board.
What is not included?
Food and drinks are not included.
Does the tour require certain weather?
The experience requires good weather. If it is cancelled due to poor weather, you’ll be offered a different date or a full refund.
Are service animals allowed?
Yes, service animals are allowed.
Does it operate every day at the same times?
It runs on a seasonal schedule with regular departures throughout the day. Start is listed at 9:00 am, but exact frequency can be affected by crowds and city conditions.
More Tours in Auckland





More Tour Reviews in Auckland





The City Centre, Covered



Newest Auckland tours to reach the site
- Waiheke Island: Gulf Marine Park Sailing Adventure & Lunch
★ 5.0 · 4 reviews - WAITOMO – Twin Caves Discovery – Private Day Tour from Auckland
★ 5.0 · 3 reviews - Volcanic Rotorua Day Trip from Auckland
★ 5.0 · 4 reviews - Waitangi Treaty Ground Day Trip Private Transport From Auckland
★ 5.0 · 3 reviews - Waitomo Caves Private Tour from Auckland
★ 3.5 · 3 reviews - Twilight Wild Kiwi Bird Encounter Private Tour
★ 5.0 · 3 reviews
Auckland City Highlights Tours, compared.
 ★ 4.6Waiheke Island: Ferry & Hop-On Hop-Off Explorer Bus TicketsFrom $593,311 reviews
 ★ 5.0Half-day Discover Auckland City Sightseeing TourFrom $461,080 reviews
 ★ 4.4Hop-On Hop-Off Explorer Bus TicketFrom $381,064 reviews
 ★ 4.8Auckland Scenic Half-Day City Sightseeing TourFrom $44532 reviews
 ★ 5.02025 Award Winning: Auckland City Highlights Half Day TourFrom $99516 reviews
 ★ 5.0Rotorua Highlights Tour from Auckland with Optional ExtrasFrom $214373 reviews
 ★ 4.0Waiheke Island Hop-On Hop-Off Explorer BusFrom $58315 reviews
 ★ 5.0Auckland City Top Spots Half Day Tour(Small Group Tour)From $99201 reviews
Where else this tour turns up