

Review · AUCKLAND CITY HIGHLIGHTS TOURS
Auckland: Hop-On Hop-Off Explorer Bus Ticket
Auckland is best when you can roam. This hop-on hop-off bus gives you an easy way to stitch together major stops, with Sky Tower views and SEA LIFE Kelly Tarlton’s ocean encounters as two of the biggest wins. The one thing to plan for is that some stops can see longer waits, so you will want a flexible schedule rather than a tight itinerary.
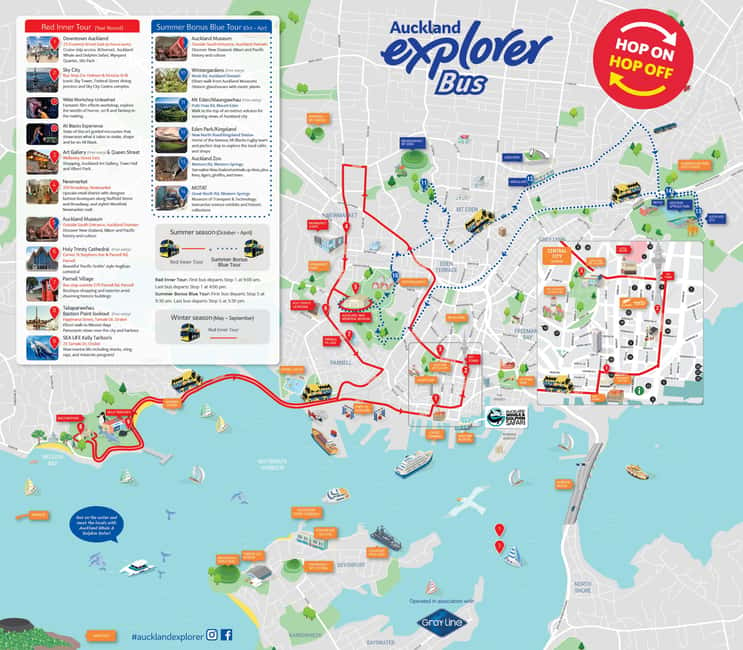
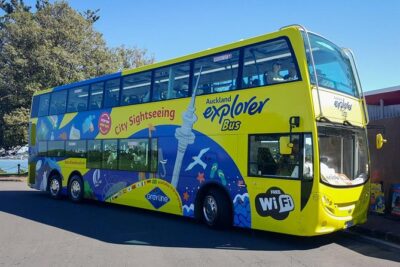
You get a full day pass that starts when you first activate it, and the Red Inner Tour runs year-round with a roughly 60-minute non-stop loop. During the summer season (Oct-Apr), a Blue route adds extra west and central sights, including Auckland Zoo and MOTAT, with the same easy hop-on hop-off format plus complimentary onboard WiFi.
Key Points If You Want the Fast Answer

- Red Inner Tour runs year-round, covering downtown and eastern highlights like Sky Tower, Auckland Art Gallery, and Kelly Tarlton’s
- Blue Summer Bonus Tour runs Oct-Apr only, adding Mt Eden/Maungawhau, Auckland Zoo, and MOTAT
- Free onboard WiFi helps you map your next move without burning data
- English commentary plus multilingual audio in the app, with headphones required for the extra languages
- About 60 minutes per loop non-stop, so you can get orientation fast before you decide where to spend more time
- Staff support is genuinely helpful, including help reported for things like making sure you catch the last bus
Other ways to see the city in a morning
- Waiheke Island: Ferry & Hop-On Hop-Off Explorer Bus Tickets★ 4.6 · 3,311 reviews
- Auckland Explorer: Sightseeing Hop-on Hop-off Tour★ 4.0 · 1,180 reviews
- Half-day Discover Auckland City Sightseeing Tour★ 5.0 · 1,080 reviews
- Auckland: Hop-On Hop-Off Explorer Bus Ticket★ 4.4 · 1,064 reviews
Ticket Value: Why $38 Can Make Sense in Auckland
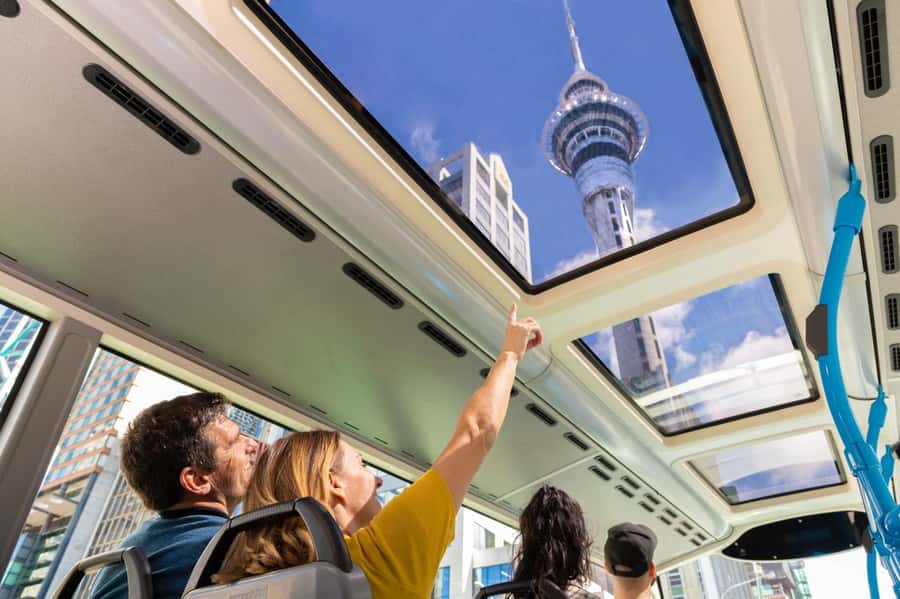
At $38 per person for one day, this bus is really buying you two things: transport across Auckland’s key areas and guided context while you ride. Entrance fees are not included, so you are still the one who decides what to pay for once you’re at a stop.
That’s exactly why it can be good value. Auckland is spread out enough that taking one bus loop can save you from juggling multiple taxis or buses, and the commentary helps you connect what you see with what it means. If you only have a few hours, you can do a lot of mental sorting fast. If you have more time, you can treat it like a “choose your own adventure” day and linger where you actually care.
One practical way I’d frame it: if you plan to enter at least one paid attraction from the route, the bus becomes a smart way to get there and understand the city. If you skip most entrances and just use it for views and orientation, you are still paying for the convenience and the onboard story.
Meeting Points in Auckland CBD: Where to Board Without a Wander Session
There are two official departure points, and getting to the right one is half the battle with any hop-on hop-off.
- Outside 23 Customs Street East (Downtown Auckland)
- Sky Tower corner of Victoria and Federal Streets (Auckland CBD)
Here’s the key practical tip from real-world experience: signage and stop-finding can be a little confusing, especially if you arrive on foot in the middle of busy streets. I recommend you arrive with a quick map check and a “trust the stop, not the vibe” mindset. If you want the simplest start, use the Downtown Auckland stop near Customs Street East, then let the loop bring you to Sky Tower and the rest.
Red Inner Tour: The Year-Round Circuit That Organizes Your Day

The Red Inner Tour is the backbone. It operates year-round and runs a full loop in about 60 minutes if you ride straight through. In other words, it’s designed for orientation, not just sightseeing.
Also pay attention to how the stops connect: you start and finish at the main Downtown Auckland stop, and the Red route covers downtown and central Auckland plus eastern highlights.
Other tickets worth buying ahead


Downtown Auckland and Queen Street: Get Oriented First
I’d put these near the start of your plan. Downtown areas are where you can reset your bearings, then jump onto the next stop when you have a clear idea of what you want to do next. If you only do one hop-on hop-off bus in Auckland, this is the route logic you want: ride it once, then choose your “linger” stops.
Sky City / Sky Tower: Tall Views and a Convenient Anchor
The Sky Tower stop is one of the most useful anchors on this route. The tour includes it for a reason: you get iconic skyline views from a structure that is described as the tallest freestanding structure in the Southern Hemisphere.
If you like mixing big landmarks with practical logistics, this is your go-to stop. Even if you do not go inside, being close to Sky Tower makes the rest of the day easier, because you are centered for downtown exploration.
Tip for your day planning: pick either a short Sky Tower check-in or an extended time block here, then build the rest of your hop-offs around that decision. Sky Tower is one of those places where “just a quick look” can turn into a longer stop.
Weta Workshop Unleashed and The All Blacks Experience: Big Name Stops You Can Choose
Two stops on this route are Weta Workshop Unleashed and The All Blacks Experience. The bus is set up so you can decide on the spot whether you want entry, or just use the location as a quick visit point.
If you are a person who hates waiting in lines after you have already committed to a plan, use these stops as a decision point: hop off, look at the entrance situation, and decide. This works especially well because the bus loops back around.
Auckland Art Gallery: A Serious Art Pause
Auckland Art Gallery is highlighted because it’s described as New Zealand’s largest art collection. That alone makes it more than a random stop. If art is even a small part of your travel style, this is worth treating like a time block, not a quick photo stop.
The bus makes it convenient because you can hop off, explore at your pace, then get back on without needing to figure out transport links right away.
Newmarket and Auckland Museum: Where You Can Spend More Time
Next up on the Red route are stops including Newmarket and Auckland Museum. The way this works in practice is simple: these are good “you will probably want more than 30 minutes” areas. One review experience I found especially helpful in spirit: someone planned longer time at Auckland Museum and basically discovered they could not do everything else justice in a single day.
So I’d be realistic here. If Auckland Museum is on your must-do list, start earlier in the day and be ready to stay longer.
Holy Trinity Cathedral, Parnell, and Bastion Point: Scenic Walking Stops
The route then moves into eastern highlights including Holy Trinity Cathedral, Parnell, and Bastion Point. These are the kinds of stops where the bus gives you a useful “arrive, walk a bit, take in the area, then move on when you are ready” rhythm.
If your day includes rain or strong wind, this is also where the hop-on hop-off format helps. You can step out when you want, then get back under cover quickly.
SEA LIFE Kelly Tarlton’s: Penguins, Sharks, and Underwater Time
This is the stop many people remember, and for good reason. The SEA LIFE stop is described as an underwater world with penguins, sharks, and other ocean wonders.
This is one of the best reasons to choose the Red route, even if you only entered one paid attraction. It gives you something indoor, weather-friendly, and family-friendly without needing you to plan complicated transit.
A practical approach: if you want photos, plan to spend enough time to enjoy the exhibits, not just walk through. If you keep hopping immediately at the first chance, you will miss the best parts.
Blue Summer Bonus Tour (Oct-Apr): When You Want the Zoo and MOTAT

The Blue Outer Tour runs only in the summer season, Oct-Apr, and it takes about 60 minutes to complete a full non-stop loop. It is designed to cover central and western Auckland, complementing the Red route rather than replacing it.
A big planning detail: the Red and Blue routes connect, with the Red route starting and ending at the main Downtown Auckland stop, and the routes connecting at Auckland Museum.
Auckland Museum to Wintergardens: A Nice Midday Change of Pace
The Blue tour includes Wintergardens Auckland Domain and Auckland Museum as core stops. If you already used Red for museum time, Blue gives you a chance to keep the story going across different types of spaces, gardens and attractions.
Mt Eden/Maungawhau and Kingsland (near Eden Park): Views and a Sports-Adjacent Area
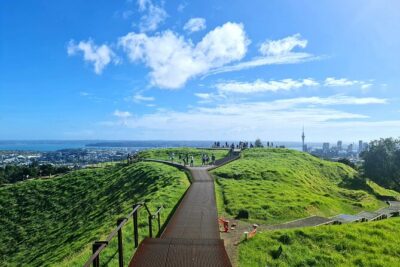
Blue includes Mt Eden/Maungawhau and Kingsland (near Eden Park). One practical note from real-world experience is that Mt Eden is a favorite for its views, so treat that stop like your prime “step out and look around” moment.
If views matter to you, timing matters too. Daylight is your friend, especially if you plan to linger.
Auckland Zoo and MOTAT: Two Strong Reasons to Use the Blue Route
The Blue route finishes with stops including Auckland Zoo and MOTAT (Museum of Transport and Technology). If those two names are on your travel list, then choosing a day that includes the Blue route can make a noticeable difference in value.
The smartest way to handle the zoo and MOTAT combo is to decide your priorities first. Zoo visits naturally take longer, and MOTAT can be a full stop on its own depending on how you like museums.
How the Audio and WiFi Work in Real Life (and What to Do About It)
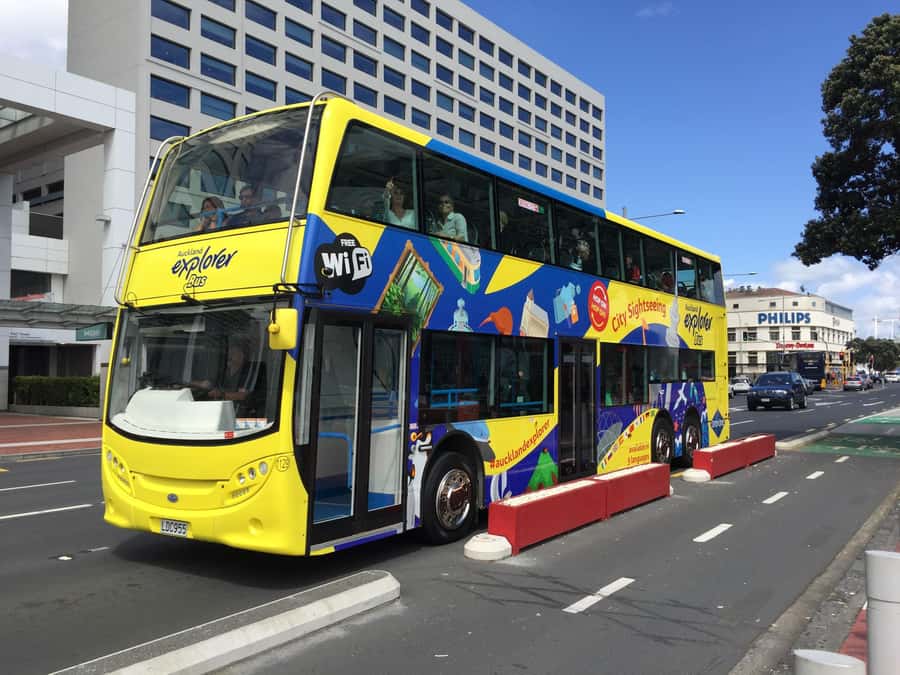
This ticket includes informative English commentary and also onboard multilingual audio through an app in Mandarin, Spanish, German, and Japanese, with headphones required for the app audio. Plus, there is complimentary WiFi onboard.
Here’s how I’d use that setup to your advantage:
- If you want the story in real time, listen to the English commentary while you ride.
- If you prefer the flexibility of switching languages, bring your own headphones and test audio early.
One real-world caution: sound quality can vary depending on where you sit and what the upper deck is doing. A couple of people had trouble hearing commentary well from higher seats. So do not assume you will hear everything perfectly from the back corner. If it’s important to you, choose a seat where you have a clear line of sight to the driver area or speakers, and keep your volume ready.
WiFi is handy in the practical sense: it can help you plan your next hop while the bus rolls, especially if you are matching your interests to the upcoming stop list.
Hop-Off Strategy: How to Avoid the “I Should Have Gotten Off Earlier” Feeling
This bus works best when you plan at least slightly, even if you want the freedom vibe. Here’s the simple strategy I recommend for a one-day pass:
- Ride at least once with few stops first. Use the Red route loop to get your bearings.
- Pick 2 or 3 linger stops, not 6. Some areas need time, especially Auckland Art Gallery and Auckland Museum, plus SEA LIFE Kelly Tarlton’s.
- Time your hops around your energy. If you hop off at every stop, you can end up exhausted and still not enjoying what you chose.
Also, keep in mind the pace. The loop takes about 60 minutes non-stop, but once you hop off, your day expands fast. A realistic expectation is closer to a couple of hours if you only do a few stops plus short walks.
Finally, if your day includes rain, the upper deck being covered can help. People reported staying dry even in bad weather when the bus was not packed, which suggests you will want to choose your seat with weather in mind.
What Can Go Wrong: Wait Times, Sound, and Finding Stops
This is the part where you keep your expectations grounded.
- Wait times can be long at some stops. Some experiences reported waiting up to around an hour for the next bus. That doesn’t mean it’s always like that, but it does mean you should avoid scheduling a paid attraction at a razor-thin time.
- Upper-deck audio can be hard to hear for some seats. If you care about the commentary, plan to adjust your seating and bring headphones for the app audio.
- Stop-finding and signage can be inconsistent. If you feel like you are walking around for a while, switch to the official stop points and re-check the bus stop corner, not the street name.
- On-board amenities are basic. One small complaint was the lack of garbage cans. So if you have snacks, plan to carry a small bag for trash.
On the positive side, staff support shows up in reviews too. People described friendly help and staff being attentive about last bus timing, which matters more than you might think when you are hopping between attractions.
Should You Book the Auckland Hop-On Hop-Off Explorer Bus?
I’d book this if:
- You want an easy way to see Auckland’s main attractions without planning transport minute-by-minute.
- You like the idea of choosing where to spend time once you arrive.
- You are doing at least one paid stop like Sky Tower, Auckland Art Gallery, or SEA LIFE Kelly Tarlton’s.
I would hesitate if:
- You need perfectly predictable timing at every stop. Because wait times can stretch at certain stops, build in buffer time.
- You rely on audio being crystal clear from every seat. Bring headphones for the app audio and be ready to reposition if you cannot hear well.
If you have a short stay, this bus is one of the better ways to get your bearings fast. If you have a full day, it becomes a practical framework so you can spend that time on the sights that actually match your interests.
Tickets Worth Buying Ahead





More Tour Reviews in Auckland



The City Centre, Covered




Newest Auckland tours to reach the site
- Waiheke Island: Gulf Marine Park Sailing Adventure & Lunch
★ 5.0 · 4 reviews - WAITOMO – Twin Caves Discovery – Private Day Tour from Auckland
★ 5.0 · 3 reviews - Volcanic Rotorua Day Trip from Auckland
★ 5.0 · 4 reviews - Waitangi Treaty Ground Day Trip Private Transport From Auckland
★ 5.0 · 3 reviews - Waitomo Caves Private Tour from Auckland
★ 3.5 · 3 reviews - Twilight Wild Kiwi Bird Encounter Private Tour
★ 5.0 · 3 reviews
Auckland City Highlights Tours, compared.
 ★ 4.6Waiheke Island: Ferry & Hop-On Hop-Off Explorer Bus TicketsFrom $593,311 reviews
 ★ 4.0Auckland Explorer: Sightseeing Hop-on Hop-off TourFrom $431,180 reviews
 ★ 5.0Half-day Discover Auckland City Sightseeing TourFrom $461,080 reviews
 ★ 4.8Auckland Scenic Half-Day City Sightseeing TourFrom $44532 reviews
 ★ 5.02025 Award Winning: Auckland City Highlights Half Day TourFrom $99516 reviews
 ★ 5.0Rotorua Highlights Tour from Auckland with Optional ExtrasFrom $214373 reviews
 ★ 4.0Waiheke Island Hop-On Hop-Off Explorer BusFrom $58315 reviews
 ★ 5.0Auckland City Top Spots Half Day Tour(Small Group Tour)From $99201 reviews
Where else this tour turns up